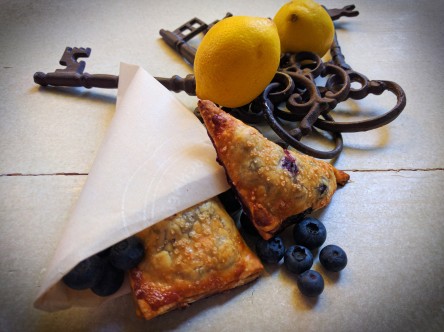
I know, I know, I already did a post for the letter P, but I couldn’t help myself! I had so many recipes to choose from that I just couldn’t narrow it down to one so you get two recipes for the price of one. You’re welcome 🙂
I enjoy a good pie, but find that I only get to eat them at large gatherings. Well readers, I bring you hand-held pies that can be prepped and frozen and then popped in the oven whenever the craving strikes! These pies are bursting with blueberries and can be prepped in under twenty minutes when using pre-made pie dough. One important tip when putting together these pies is to work as quickly as you can. When you add sugar to berries, the juices from the berries start to extract which is great when making a berry shortcake, but not when making a pie to freeze as that juice will form ice crystals and could create sogginess in the final pie product.
Add these pies to your weekend food prep and you can reap the benefits for weeks to come! Happy Sunday!
Ingredients
- 1 round 9-inch pre-made pie dough sheet (I used Pillsbury, but this recipe will also work with homemade if you want to put in the extra effort and have a favorite recipe)
- Flour for dusting counter/cutting board to prevent pie dough from sticking
- 1 cup of blueberries
- 1 ½ teaspoons fresh lemon juice
- ¼ teaspoon lemon zest
- ¼ teaspoon orange zest
- 2 tablespoons white sugar
- Sprinkle of cinnamon
- Pinch of kosher salt
- When ready to bake, you will need one egg and a pinch of raw sugar
Prepping the Pies
- Rinse and dry blueberries, taking care to pick out any stems or berries that are past their prime.
- In a medium bowl, toss blueberries with the lemon juice, lemon zest, orange zest, white sugar, cinnamon and salt.
- Place the pie dough on a flour-dusted surface and cut it into six triangles.
- Pile the filling evenly between the six pie pieces on one half of the dough, this will create an easier job when it comes time to fold them.
- Dip your fingers into water and lightly brush the edges of the pie dough before folding to create a better seal.
- Gently fold one half of the pie dough over the filling and press to seal the edges. If you want to create a decorative edge, you can use the tines of a fork to press down and seal.
- Place the prepared pies on a parchment lined sheet pan and cover with plastic wrap.
- Place the pies in the freezer for four hours and then transfer to a freezer-safe bag to store.
- I suggest writing the below information on the freezer bag so you have the baking instructions on hand when you are ready for pie!
- When you are ready to munch on one of these hand-held pies, preheat your oven to 425F and put the sheet pan in the oven.
- Putting the sheet pan in the oven while it preheats will help create a crispy crust for your pie.
- While the oven is preheating, whisk one egg in a small bowl to create your egg wash.
- Pull out one pie and place on a piece of parchment paper. Brush the top of the pie with the egg wash and sprinkle with raw sugar. Carefully create a ½-inch slit on the top of the crust to allow for steam to escape during the baking process.
- Put the pie with the parchment paper in the oven on the warmed sheet pan and bake for 10 minutes at 425F.
- Reduce the heat to 350F and bake for an additional 10 minutes until the crust is golden brown and the filling is bubbly.
- Allow the pie to slightly cool on a cooling rack before enjoying!
Inspirations for this recipe: Bon Appetit, Fine Cooking, and Foodie with Family
